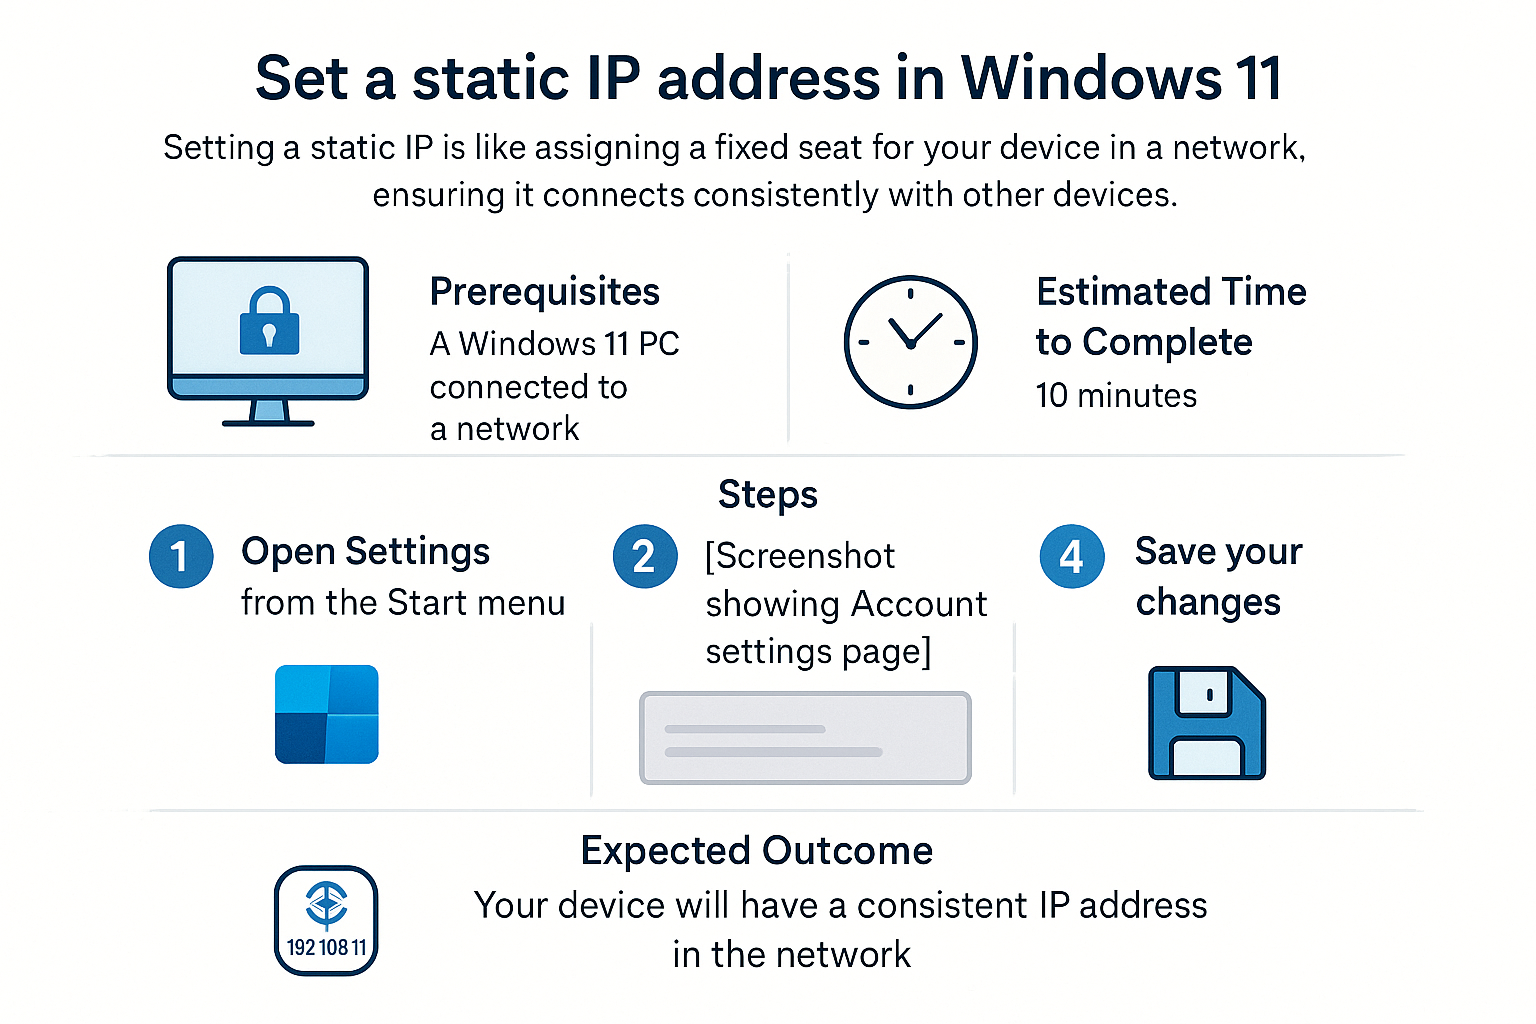
Set a static IP address in Windows 11
Setting a static IP address on your computer can be compared to giving your home a permanent address. Just like having a fixed address helps your mailman deliver your letters correctly, a static IP address ensures that your device can always be found easily on your network. This can help with things like online gaming, printing documents over Wi-Fi, or accessing home servers.
Prerequisites
Before you start, make sure you have:
- A computer running Windows 11.
- Access to your router's admin interface (you may need the username and password).
- Basic understanding of your local network settings (you can often find this details from your current network).
Estimated Time to Complete
Approximately 10-15 minutes.
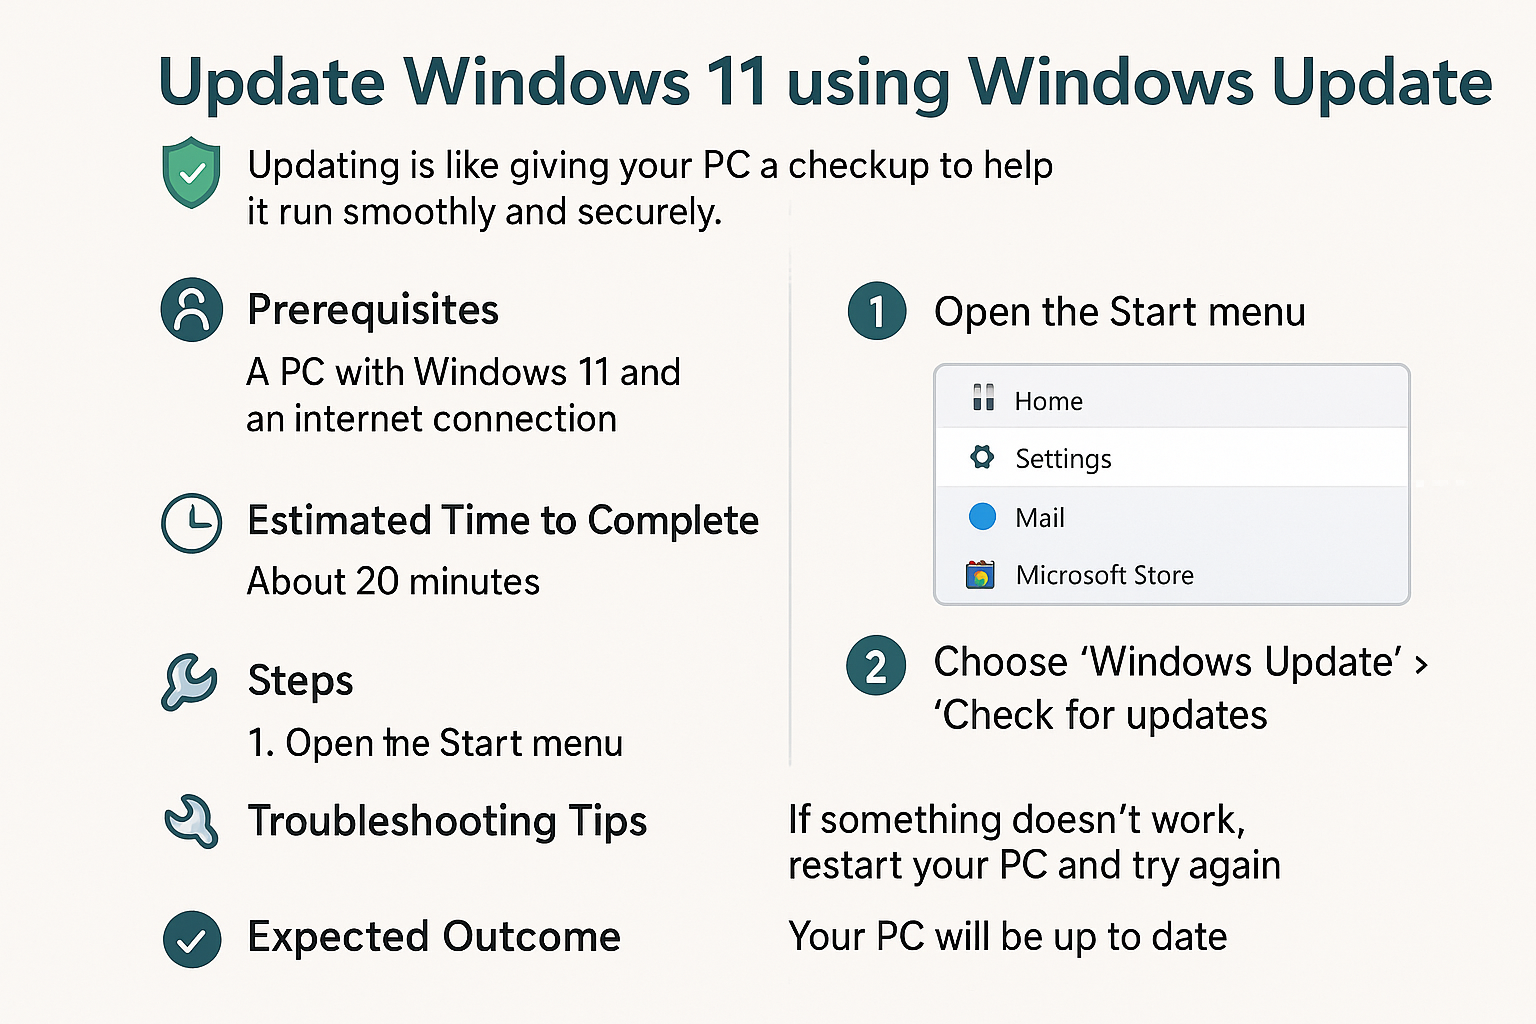
Steps
-
Open Settings
Click on the Start Menu at the bottom left of your screen and select the Settings gear icon.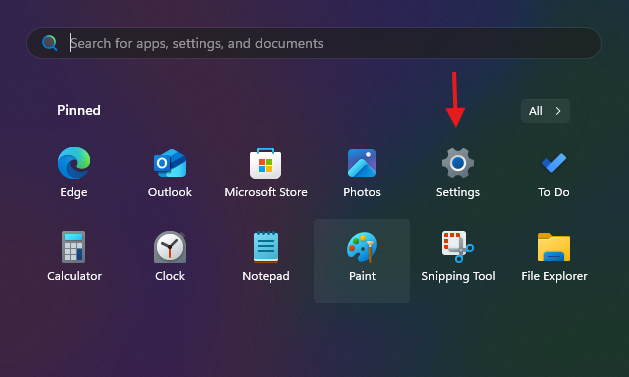
-
Navigate to Network & Internet
In the Settings window, click on Network & Internet from the sidebar list.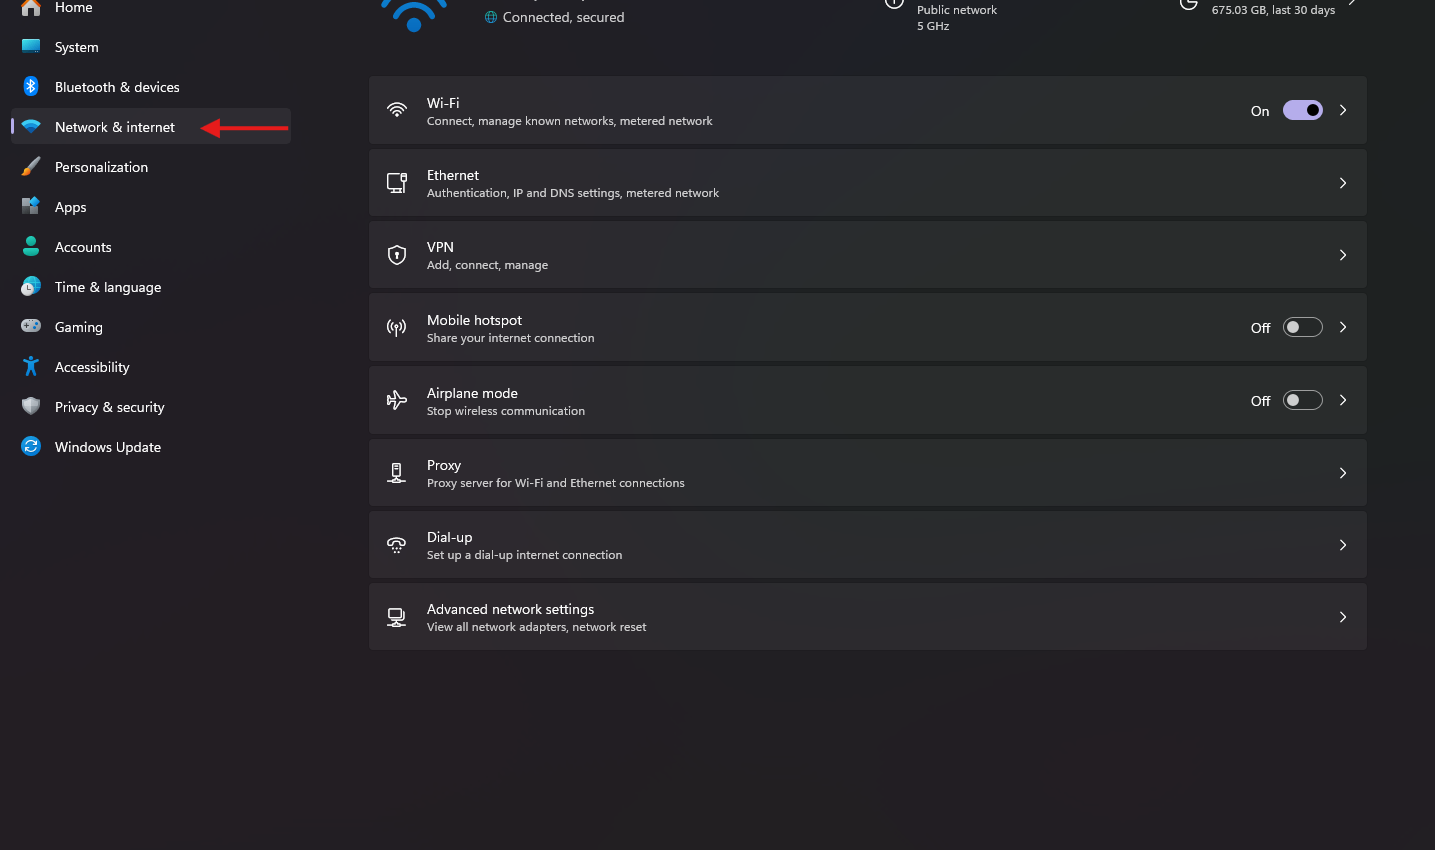
-
Select Ethernet or Wi-Fi
Depending on how you're connected to the internet, choose Ethernet (if using a wired connection) or Wi-Fi (for wireless).

- Click on Properties
Select the option that you are using.
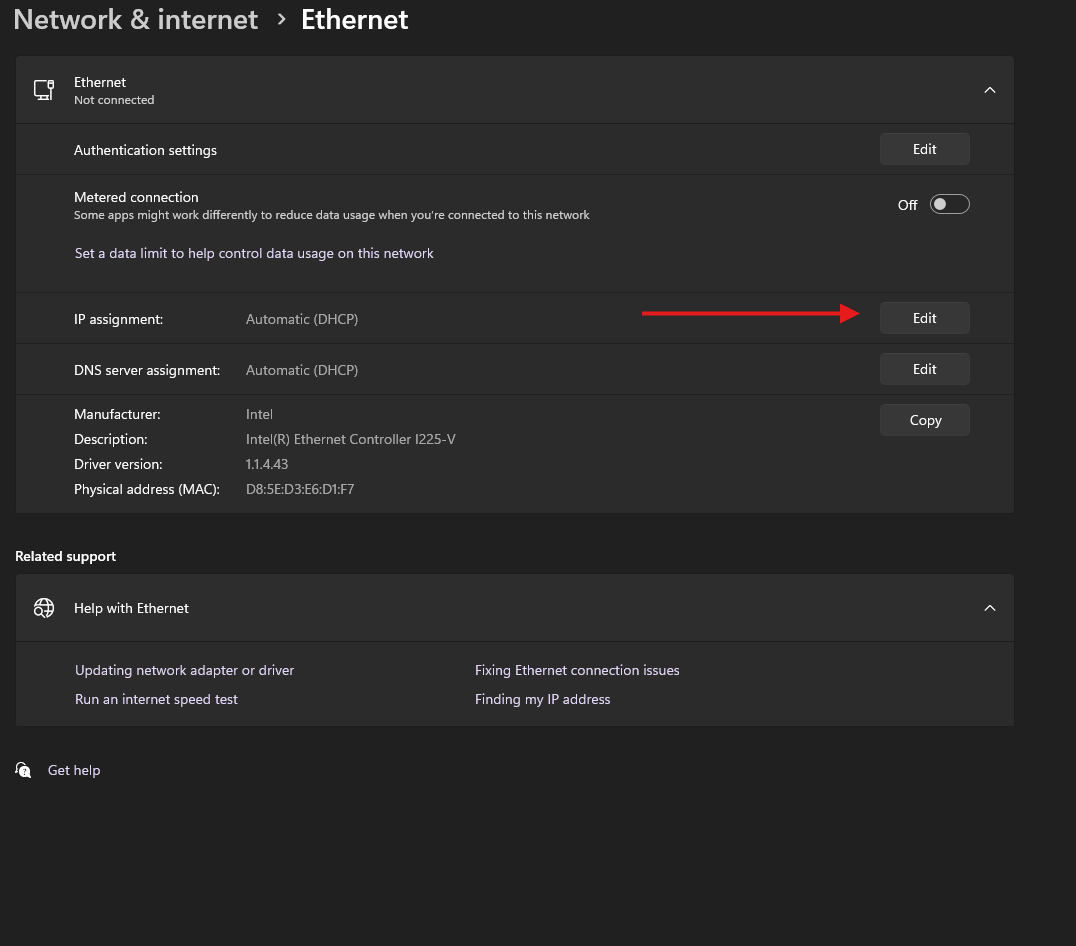
- Edit IP Assignment
Scroll down to the IP assignment section and click on the Edit button next to it.
-
Set to Manual
In the pop-up, switch the IP assignment dropdown from Automatic (DHCP) to Manual.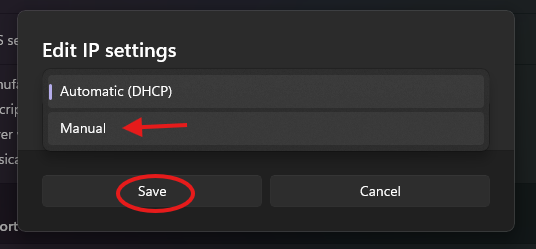
-
Enter IP Address Details
Fill in the fields for the following:- IP address: Choose a static IP (e.g., 192.168.1.100).
- Subnet mask: Typically, it’s 255.255.255.0.
- Gateway: This is usually your router's IP address (e.g., 192.168.1.1).
- Preferred DNS: You can use your router’s IP or a public DNS like 8.8.8.8 (Google's DNS).
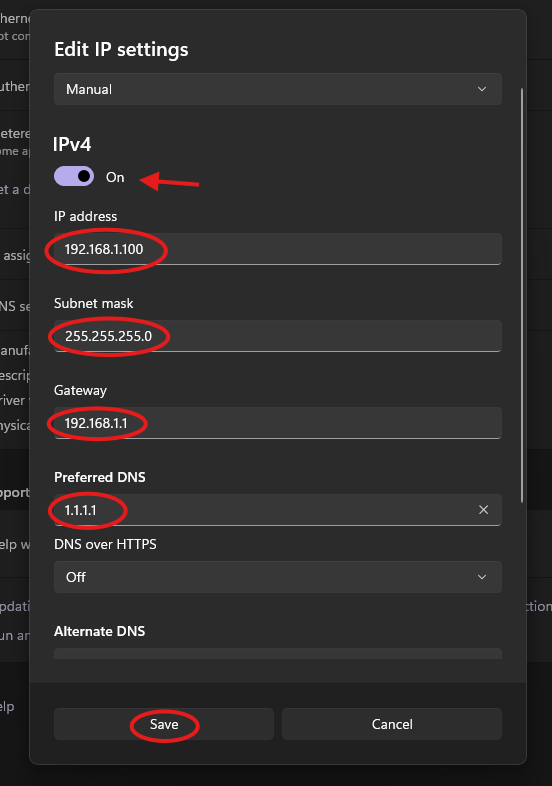
- Save Changes
After entering the details, click Save to apply changes.
Troubleshooting Tips
- Can't Connect: If you find that you cannot connect to the internet after setting the static IP, double-check the IP address, subnet mask, and default gateway for any typos.
- Address Conflicts: Ensure the IP address you chose isn’t already assigned to another device in your network.
- Router Issues: If you changed settings on your router, make sure it’s functioning properly and that you've saved all changes there as well.
If you’re unsure, it’s okay to stop and ask for help before trying again.
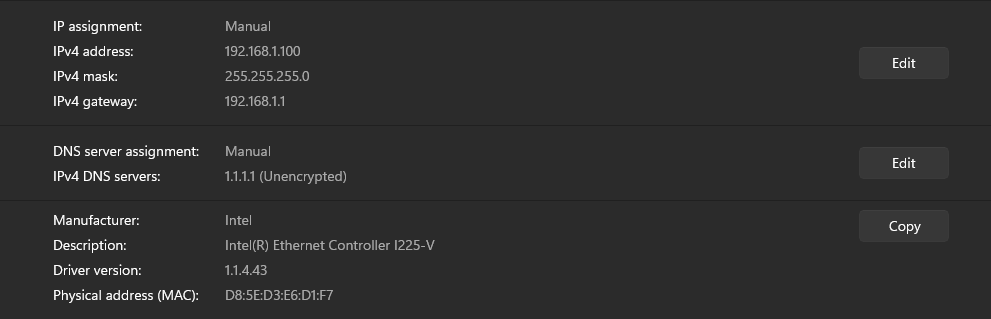
Expected Outcome
After completing these steps, your Windows 11 computer should have a static IP address, allowing for more reliable connections to your local network devices and services.
Password Tip: Use at least 12 characters with a mix of letters, numbers, and symbols. Avoid names or birthdays.