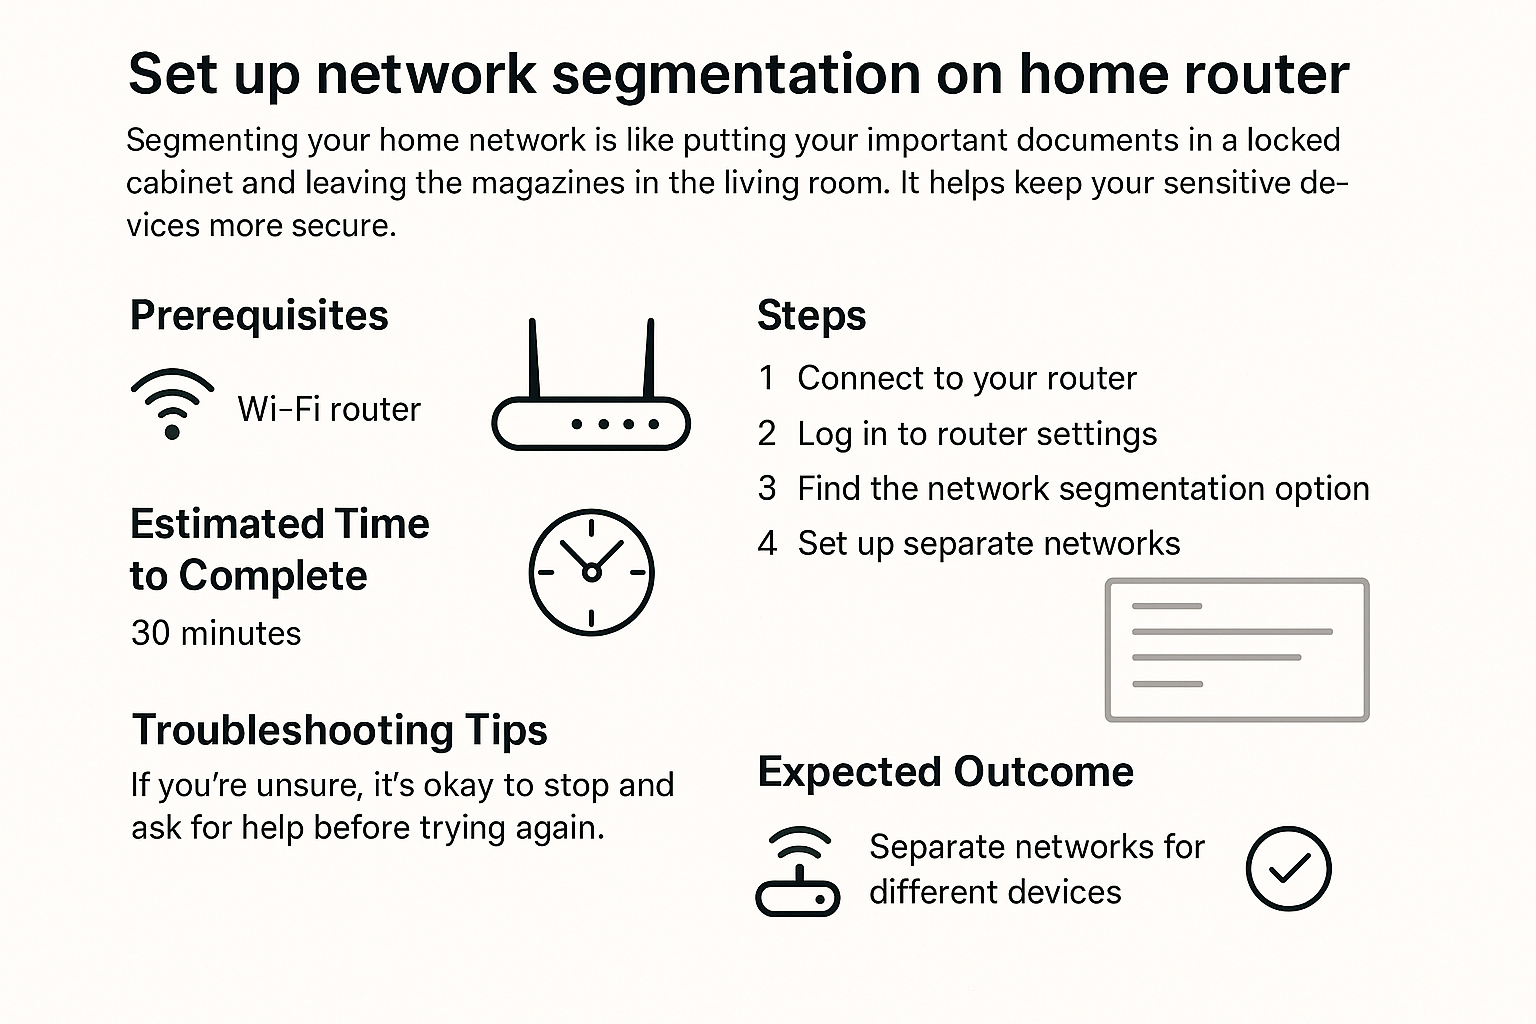
Set up network segmentation on home router
Setting up network segmentation on your home router is like creating separate rooms in your house, where each room has its own purpose and privacy. Just as having a quiet room for work keeps distractions away, segmenting your home network allows you to separate devices for better security and management. This means you can keep your smart devices, computers, and guests on different networks to reduce risk and improve performance. Let’s walk through how to do this together!
Prerequisites
Before you start, make sure you have:
- A home router that supports network segmentation (most modern routers do).
- Access to your router's admin interface. This usually involves knowing the router's IP address, username, and password.
- A computer or device connected to your home network.
Estimated Time to Complete
This should take about 30 minutes to complete, depending on your router model.
Steps
-
Connect to your router
- Open a web browser on your connected device and type your router's IP address into the address bar. Common addresses are
192.168.0.1or192.168.1.1. Press Enter.
- Open a web browser on your connected device and type your router's IP address into the address bar. Common addresses are
-
Log in to the router's admin interface
- Enter your username and password. If you haven’t changed it, the default is often found on the back of the router or in its manual.
- If you can’t log in, check your router's manual for the default login credentials.
-
Locate the network settings
- Look for a section labeled Network, Advanced, or Settings in the menu. This can vary depending on your router’s interface.
-
Create a new network (SSID) for segmentation
- Find an option to add a new SSID or network. This might be under a section called Wireless or Guest Network.
- Choose a name for your new network and set a strong password.
- Tip: Use at least 12 characters with a mix of letters, numbers, and symbols. Avoid names or birthdays.
- Enable the network (look for a checkbox or toggle).
-
Assign devices to the new network
- Disconnect any devices you want to move onto the new network and reconnect them using the SSID and password you just created.
- Consider placing less secure devices (like smart cameras) on this new network.
-
Save your changes
- Look for a Save or Apply button to ensure your settings are updated.
Troubleshooting Tips
- Can’t access the router? Double-check the IP address and ensure you're connected to the network.
- Forgot your login? Try common defaults or reset the router by holding the small reset button for about 10 seconds. Remember, this will erase all settings.
- Devices won't connect to the new network? Make sure you’ve entered the password correctly and that the device is within range.
If you’re unsure, it’s okay to stop and ask for help before trying again.
Expected Outcome
After completing these steps, you should have a functioning segmented network that helps protect your devices and improve your network performance. You'll feel more secure with your smarter devices separated from your computers!
Feel free to explore and adjust settings in the router as you get more comfortable; you’re doing great!