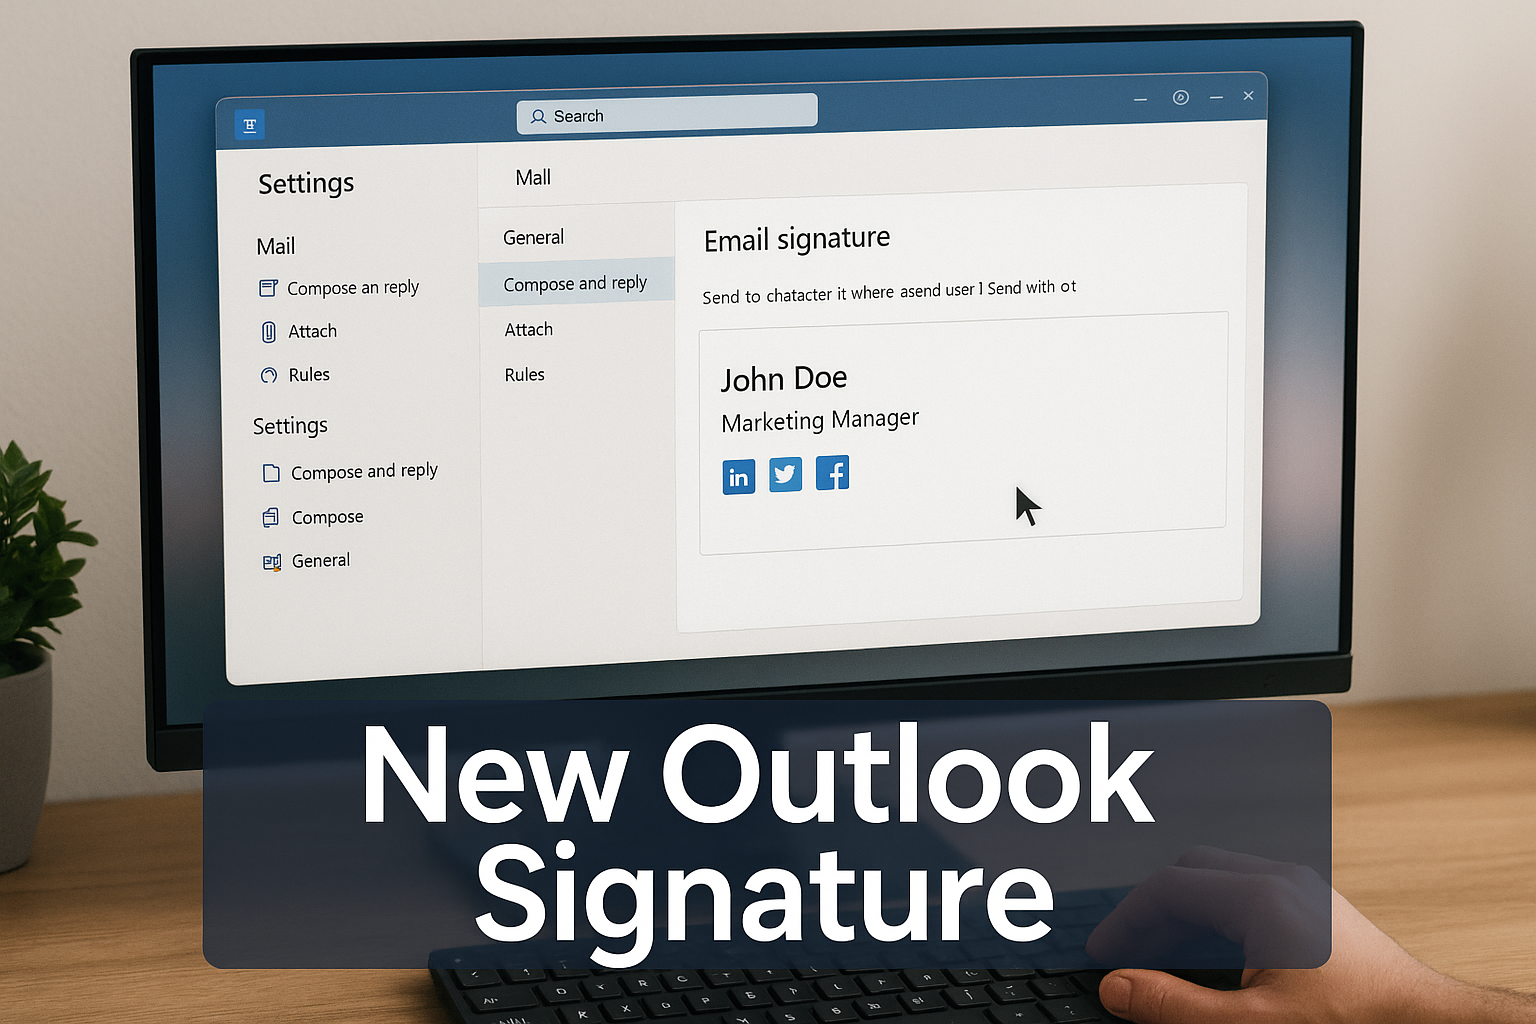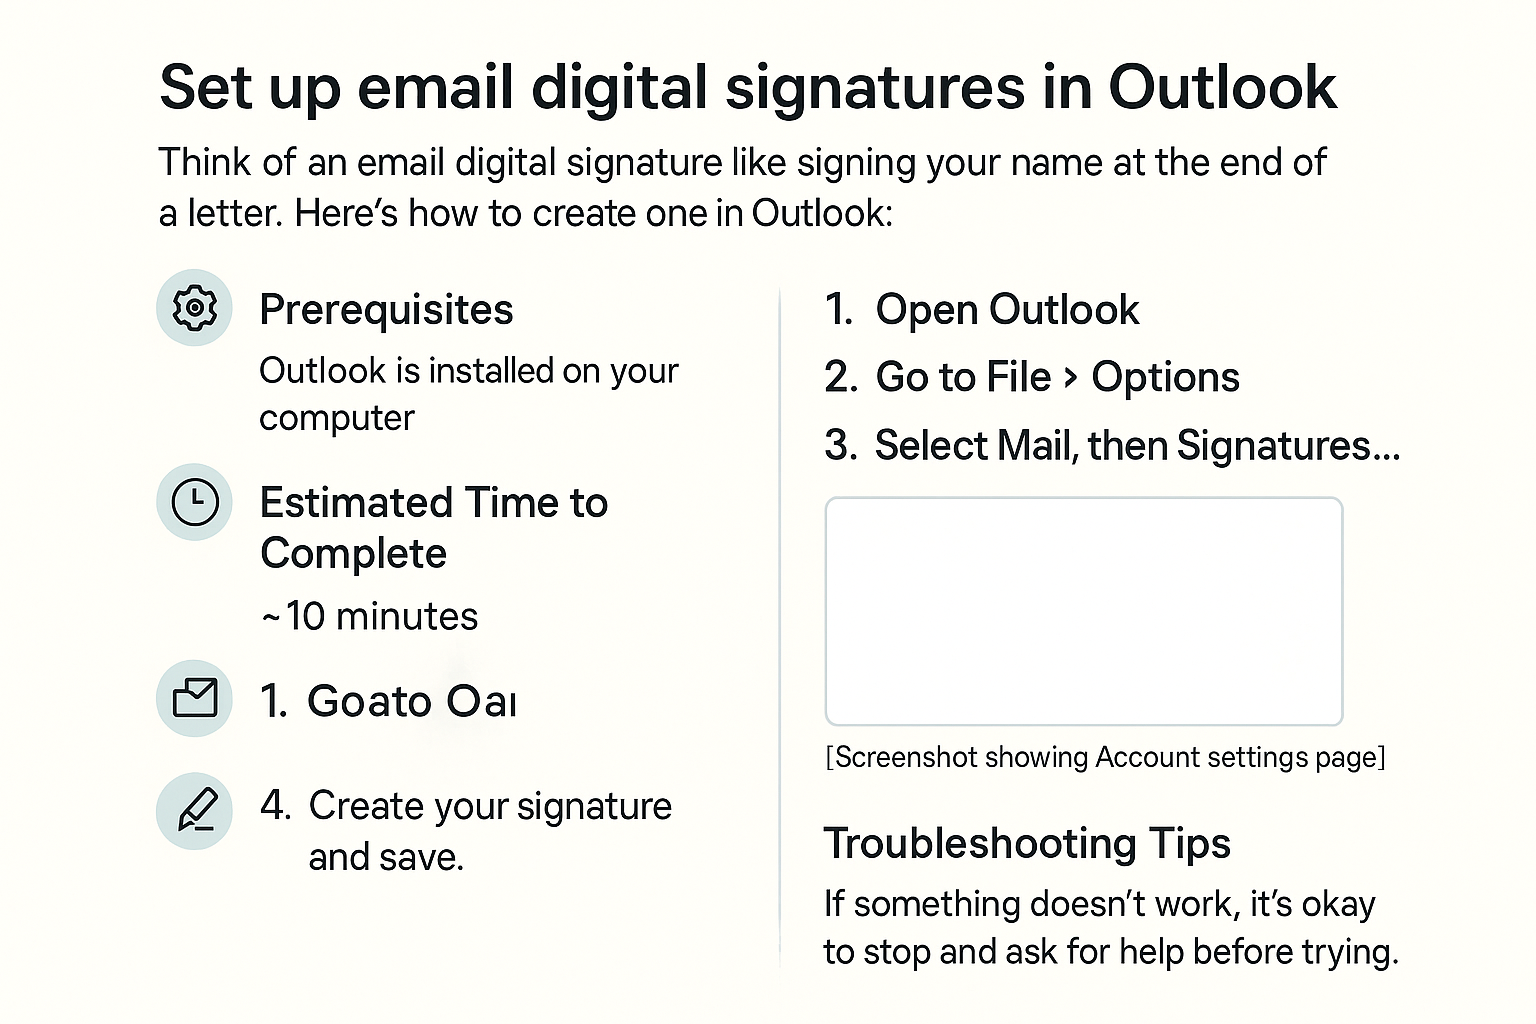
Set up email digital signatures in Outlook
It also ensures the message hasn’t been tampered with. Let’s walk through how to set one up so your emails look more official and secure!
Prerequisites
Before you start, make sure you have the following:
- A computer with Microsoft Outlook installed.
- An email account set up in Outlook.
- A digital certificate (sometimes called a digital ID), which you can usually get from a trusted provider.
Estimated Time to Complete
This task should take about 10-15 minutes.
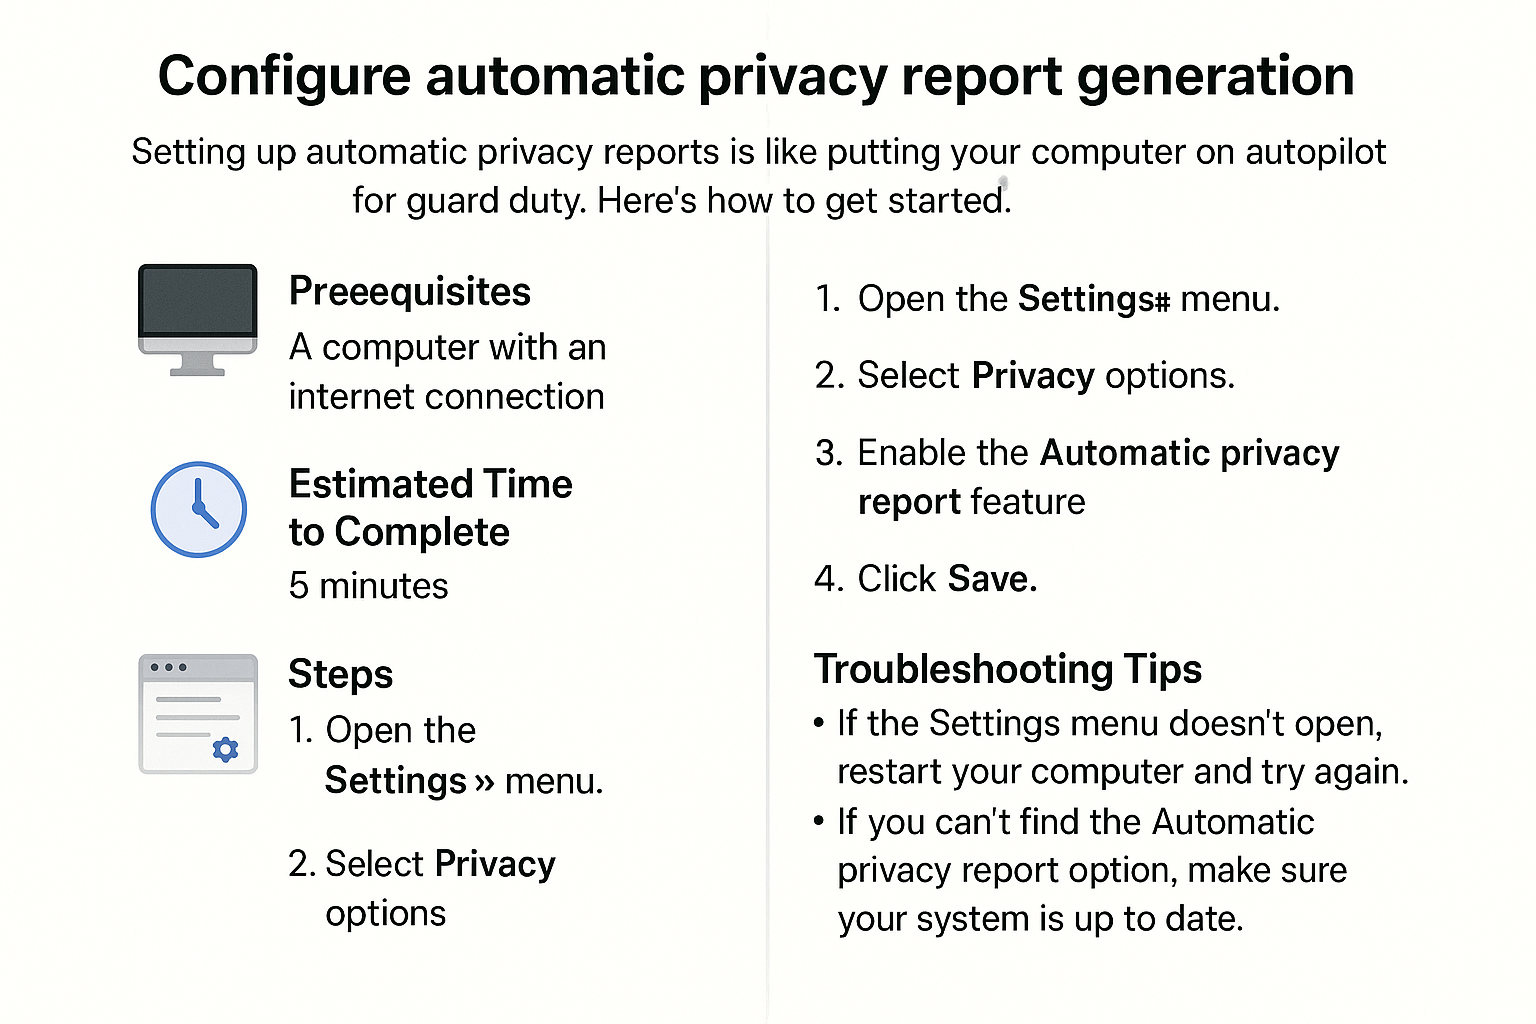
Steps
- Open Microsoft Outlook. Launch the application on your computer.
- Go to the File menu. Click on "File" in the top-left corner of the screen.

- Select Options. In the menu that appears, click on "Options."

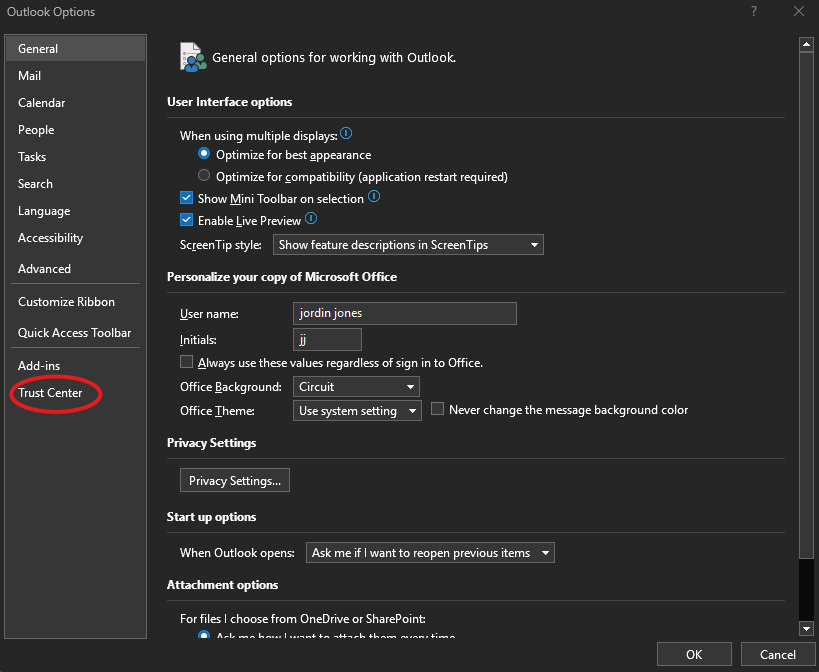
- Click on Trust Center. In the Outlook Options window, find and click on "Trust Center" in the left sidebar.
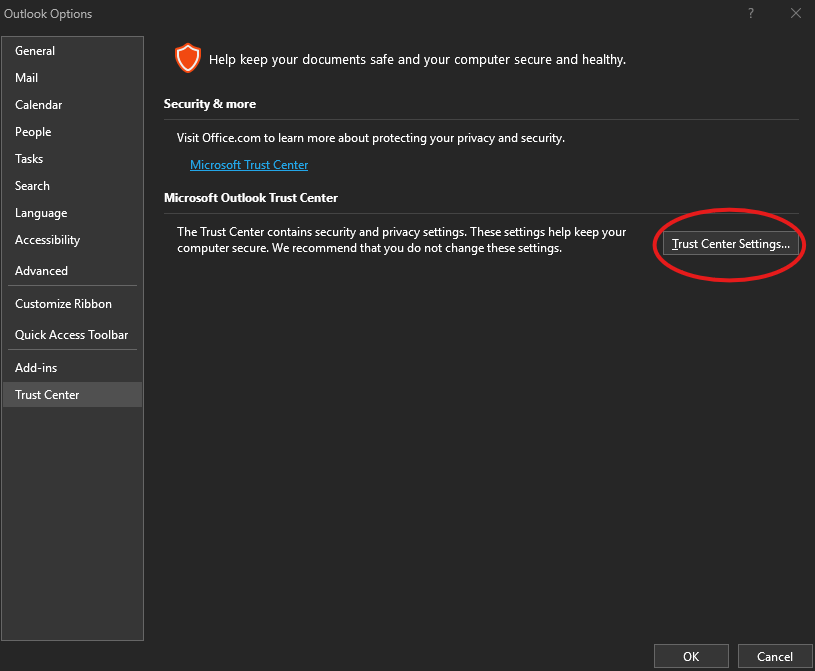
- Open Trust Center Settings. Now click on the "Trust Center Settings..." button on the right.
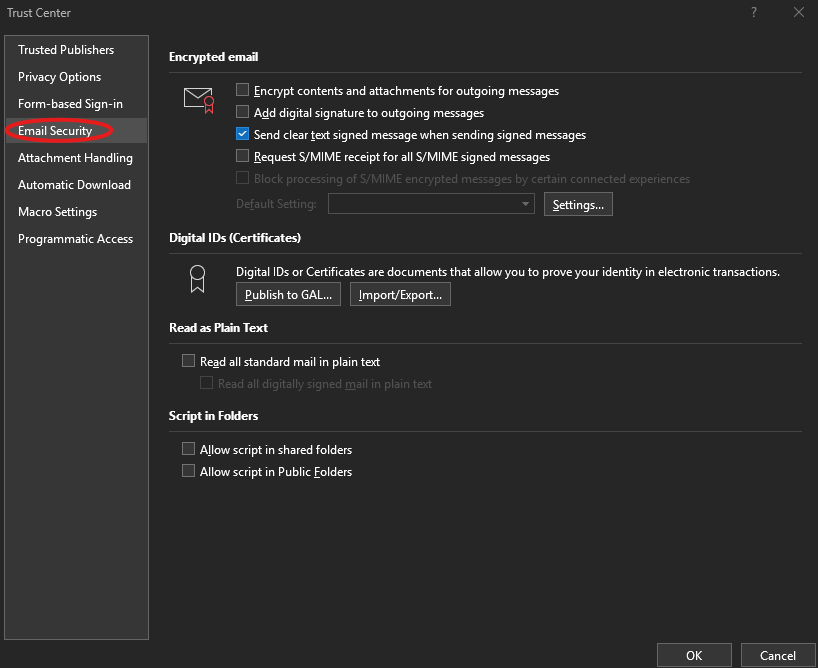
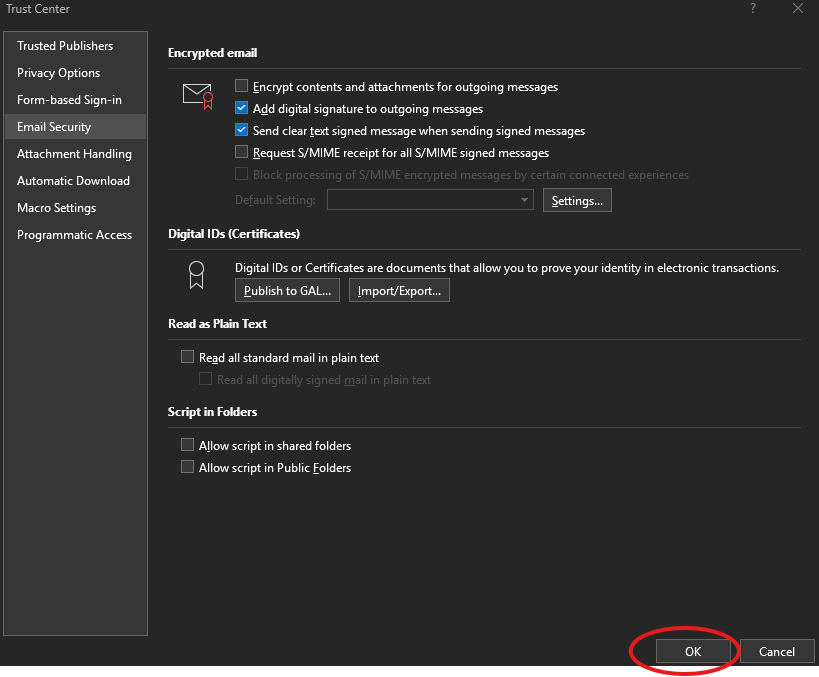
- Choose Email Security. In the Trust Center window, select "Email Security" from the list on the left.
- Set up your digital ID. Under “Digital IDs (sCertificates),” click on “Get a Digital ID” or “Import/Export” to add your certificate if you already have one.
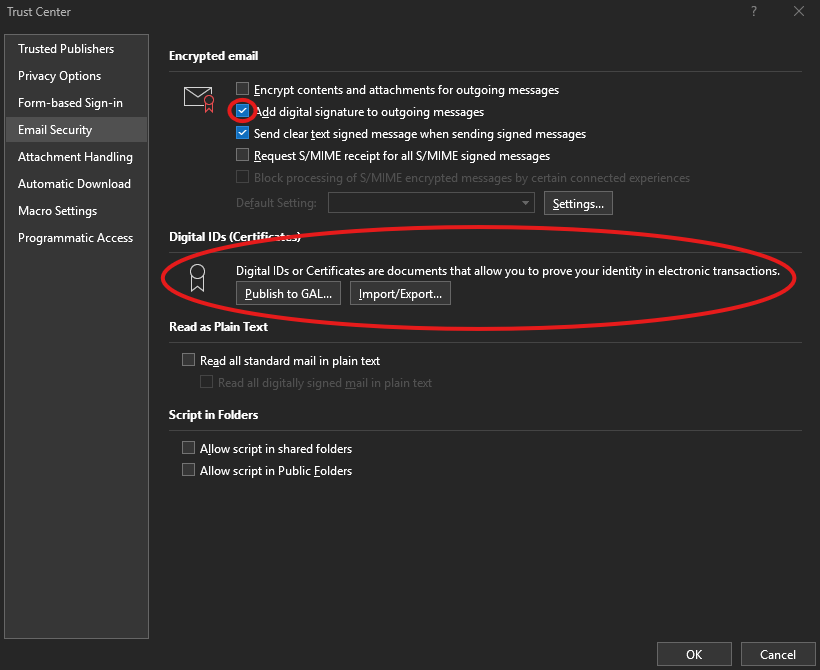
- Create a new digital signature. In the same Email Security window, check the box next to “Add digital signature to outgoing messages.”
- Click OK to save your settings. Keep clicking OK to exit out of the Trust Center and Options settings.
- Test your digital signature. Compose a new email and send it to yourself. Make sure to check for the signature at the bottom of your email!
Troubleshooting Tips
- Not seeing the digital signature in emails? Double-check that you’ve enabled it in the Email Security settings and ensure your digital certificate is properly installed.
- Certificate issues? If you encounter any problems with your digital certificate, try contacting the provider where you obtained it for additional support.
If you’re unsure, it’s okay to stop and ask for help before trying again.
Expected Outcome
When you finish these steps, your emails will include your digital signature, letting recipients know that the message is authentic and has not been changed.
Bonus Tip: When creating accounts or setting up passwords, remember to use at least 12 characters with a mix of letters, numbers, and symbols. Avoid using names or birthdays for additional security.
Happy emailing!